Updating Azure DevOps Release Pipeline

Initial Configuration
During the initial setup of the website, I just took the default pipeline to build and deploy the website directly to my Azure WebApp. Initially, the process was adequate the website has minimal usage. But it did mean deployments took the website offline during the deployment phase and then needed to spin up again afterwards. To streamline the deployment, I wanted to start using deployment slots. Deployment slots would allow the deployment and startup process to be down away from the production site and allow for a final validation step before switching the site live with the new changes.
Changing pipeline
To start using deployment slots, I would need to increase the App Service Plan to a Standard plan. Due to the nature of the site, I had not needed any of the other standard features until now.
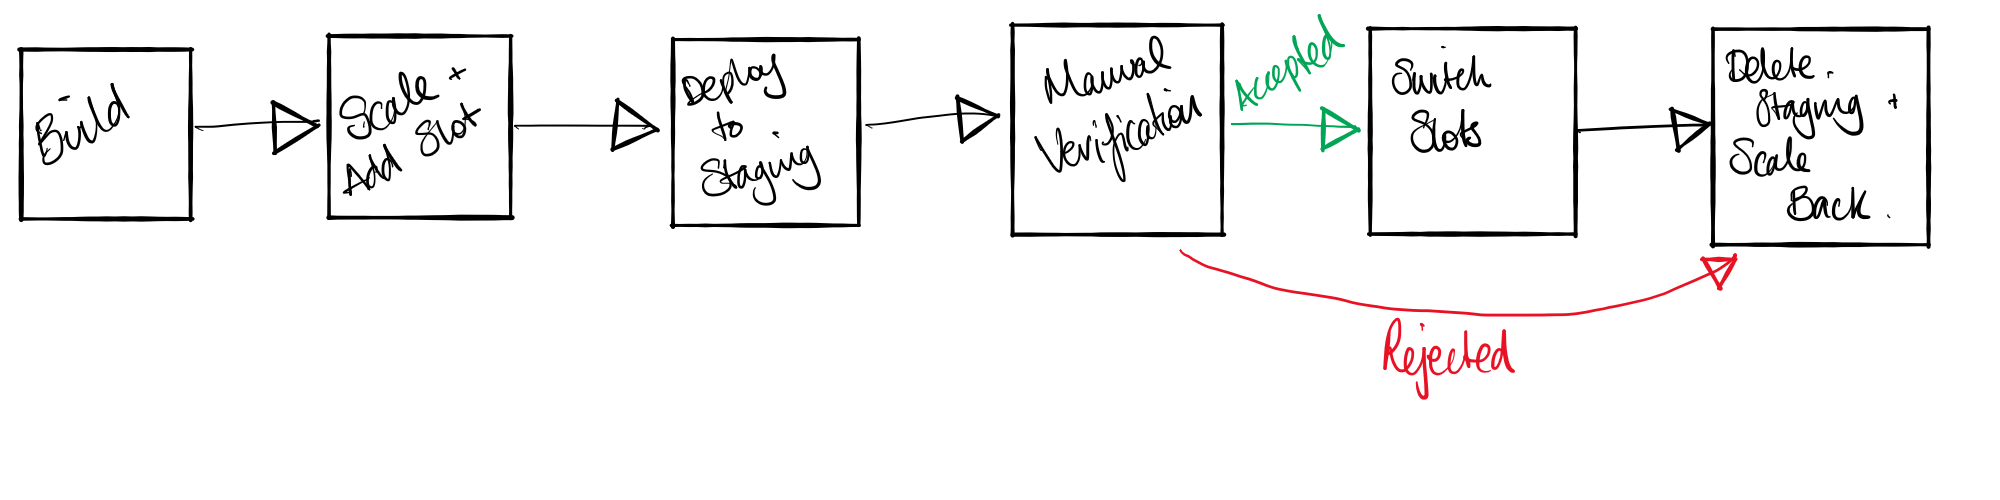
To minimise the cost of running this site on a Standard App Service Plan, I have decided to add a couple of additional steps to the release pipeline. These steps scale the App Service Plan to a Standard plan and add a deployment slot. The new website gets deployed to the new slot. If the build is accepted, then the slots are swapped, and then the App Service Plan is scaled back to a Basic plan. If the build is rejected, then the staging slot is just be deleted and the service plan scaled back, without switching the slots.
These steps allow me to gain the benefit of the Standard App Service plan features I need when I need it, but keeps the costs down when the features aren’t required.
Using Stages and Post Deployment Approvals
After doing some initial reading around using the Release pipeline, I started using multiple stages with Post/Pre Deployment Approvals. These allow for manual checks and intervention into the pipeline process before final deployment.
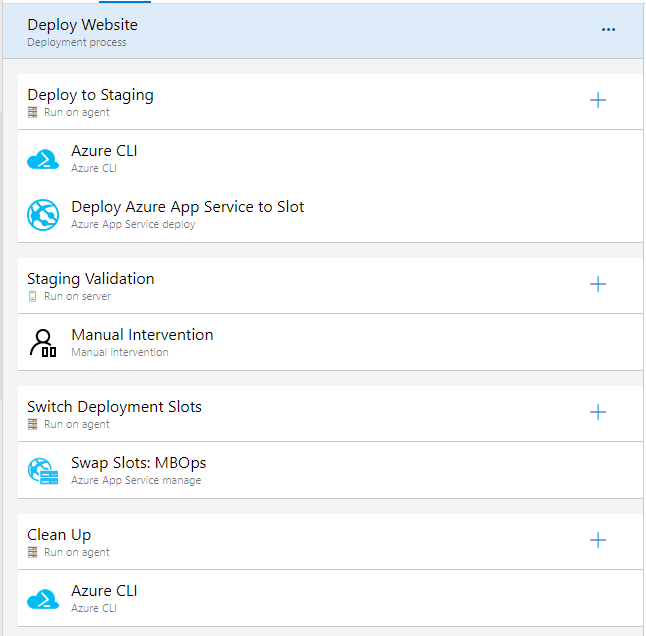
I had a single-stage with two jobs to scale out and add the deployment slot using the AzureCLI commands and then deployed the website to the newly created staging site. This part of the workflow worked correctly. It allowed for the staging site to be created and deployed for final checks. I then added post-deployment approvals to this stage so I could pause the pipeline before it progressed to additional stages.
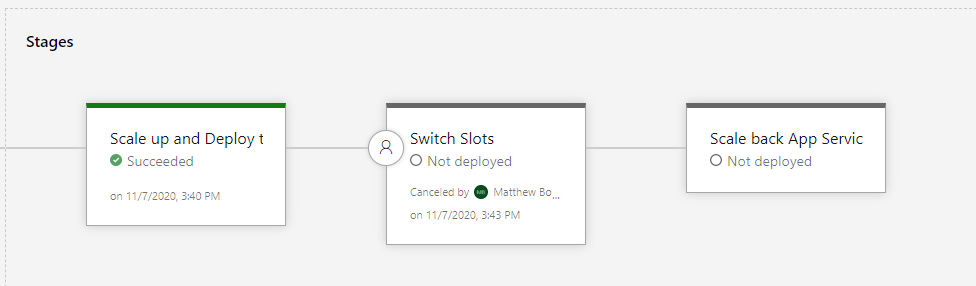
This approval step worked brilliantly if I just wanted to pause the pipeline and have it error at this point if the manual validation found an issue. The issue I had was having was ensure the clean-up stage was trigger with either result of the post-deployment approval. To ensure I was not spending money unnecessarily, I wanted to ensure that the WebApp gets scaled back to Basic no matter the outcome of the manual approval step.
Any further stages would not trigger after a previous one failed. The only way additional stages I could get the later stages to run was via manual triggering.
Using Single-Stage with multiple jobs
I then moved to combine all tasks within a single stage, using a manual invention step, I was able to achieve a similar result to the post-deployment approvals. But it also allowed me to have a final clean up task run no matter the results of previous jobs.